Sunday, 4 April 2010

And that's a wrap


After the cut-a-cat adventure, the exhausts were looking a little tatty. With hindsight, there are two much better methods of de-catting them:

1) A single cut near the end of the cat bulge.
2) Just buy a set of nice shiny chromed and cat-free exhausts, £60 delivered for the pair.

I sprayed my pipes with high temperature silver paint, but it didn't really match the rest of the bike. Black would have been a better choice, but I went another way.

Something that's making a faddy comeback at the moment is exhaust wrap. It's basically a fibreglass tea-cosy for the exhaust. The techno-babble is that it keeps the temperature of the gasses up inside the exhaust which helps them flow through faster. That's as maybe, but it also covers up sloppy weld jobs, and makes the exhaust look a little fatter.

I did some rocket science that indicated I'd need 5 metres to cover around 60cm of exhaust. That seems like a lot, but it's all about pi. Mmmm, pi. For once, I got my reckoning right, and 10m just did both exhausts, nicely secured with stainless steel tie wraps.

Does it make any difference to the performance? Not so as you'd notice, but that's not why it's there, is it? The main effect is to soak up water, WD-40, ACF-50, road dirt and such, and steam or burn it off in huge clouds every time you stop. Larks!

Easter weekend seemed like a good time for a spring clean. The bike was looking pretty grubby after winter riding, and there was actually some road grit layered on it - we're not having that. "Gunk" engine cleaner is just the ticket for de-grubbing, and I spent a happy hour brushing the best part of a litre of it into all the crevices of the bike, including a thorough soaking of the chain, which was in dire need of a clean. A good wash down, and the sparklies were restored, then treated to a good coat of ACF-50 to keep them that way.

It was also time for some basic maintenance; a chain tension and rear brake adjustment, inspection of all the nuts and bolts, and I bled the front brake, which was starting to feel a little spongy. The year-old fluid was already looking fairly mucky, so it was easy to see when the clean stuff came through from the master cylinder.

The other modification I made recently was to remove a few things from the bike, namely the L plates. Huzzah! I am now a Big Boy (Jnr). I really don't need a bigger bike for my commute or pleasure jaunts, so unless I plan some touring in this year, I'll be sticking with my 'Firebird'.

I didn't have any lessons, I just went for it. £31 for the theory, £15 for the Mod 1 offroad, £75 for the Mod 2 on road, twice, as I failed the first one (darn unmarked crossroads), works out well compared to the cost of training, or of re-sitting my CBT which would have been up at the end of April. The DSA has recently acknowledged the existence of our bikes, and has classed them as A2, i.e. proper bikes capable of 100kph, so there's nothing stopping you from sitting your test on your Firebird, waiting 2 years, then buying a Hayabusa. Excelsior!

Thursday, 25 March 2010

Ride In Peace, chumrade


Last summer, my workmate Andy and I went on a bike tour of Scotland together on our plucky little 125s. A brilliant time was had. Laughs, spills, and anyone complaining got to be Charley (Boorman) for the day.

Like myself, Andy was planning to sit his test and move up to a Big Boy bike this spring, either a Suzuki Bandit or CBR600. He took a week off, and I was looking forward to telling him that I'd passed my theory and Mod 1 when he came back.

Last week, Andy's mother called him in sick after his holiday. We assumed he'd just got a bad dose of the cold that was going around. After a week with no news, we were shocked to hear that he had been taken into hospital, and that he had cystic fibrosis.

We found it hard to believe; cystic fibrosis is a chronic hereditary condition for which there is no cure, and which is usually debilitating and eventually fatal. Andy always seemed so healthy, and had never mentioned it to anyone outside his family, never complained about it or made an issue of it, not once.

With treatment and good luck, people of Andy's age with cystic fibrosis can live on into their 30s or later.

Andy was not lucky. He died on Tuesday night aged 26.

Andy will be sadly missed by all who knew him. I will remember him fondly as a gentleman, and the best of bike buddies.

Sunday, 21 February 2010

Let there be... different light


We need to talk. Times are tough, and I have to let you go.

The stock rear light cluster, I mean. Nice enough, but I think it looks out of place with the smaller seat.

I eBayed a smaller chromed light, and tonight I bodged it on. Now, normally I'd go in with the angle grinder, but the kiddies were in bed, so I had to do it on the shush. Also, there may be an element of learning involved here, in that I decided not to cut the stock light cluster mount to bits - yet. It also mounts the indicators and number plate, so it'll need some thinking through.

The temporary solution was to put a bit of 20mm x 20mm x 2mm aluminium angle across the two mounts for the stock light cluster, and hang the new light underneath. It doesn't look ideal, but it'll do for now. I can always go back and screw it up later.

Anyway, cut to the chase, here's the new light in situ:


I'll leave it until next weekend, then if I'm still enamoured of it, I'll likely lop the top off of the mount, run a bar across from the indicator bolts, and mount the rear light on top. Or not, as the whim takes me.

Something to watch out for is that The Man requires rear reflectors (stuck to my panniers, huzzah), and also a number plate light. The stock cluster has a clear patch underneath that ostensibly lets some light down onto the plate, but I'll have to add another light to do this. LED, naturally. eBay, ho!

[Update]

Ho'd!


Winner!

Sunday, 7 February 2010

Warp core offline: proceed on emergency impulse power


Prepare to jettison warp engines and disengage by sublight evasion.

Another day, another adventure. Sunday beckoned, flouting her tempting charms at me, and off I went for a jaunt. Just a few miles, off to try and find the missus (farming, as she has a wont to do), then on to le supermarché pour la grub et les stúff.

There were a few big bumps in the road on the way, courtesy of emergency repairs to the winter potholes - which I'm sure the Cooncil intends to sort out properly later - but I didn't think anything of them. See as I cunningly build an alibi for myself for what is about to occur...

Exiting the car park and hitting a little hill, the bike suddenly faded and spluttered. Oh dear. This again - it happened on the Lang Way Roond trip as well, on the Lang Way Hame, due to the main jet needle being unsecured and riding way too high (mea culpa).

A quick haul onto the pavement, and the diagnosis began. The last thing I'd done before going out was to grab my trusty multitool(*), and damn glad I was to have it.

The plug was seriously fouled. Hmmm, that's familiar. I immediately suspected the needle again, but decided to clean the plug and lean the idle mixture out first to see if that sorted it. Nope, although I did get another 1/4 mile closer to home, nursing the bike along in gaps in the traffic.

At the next spluttering expiration, I parked up and unscrewed the throttle assembly on top of the carb to check the needle. Unfortunately, it was fine, properly secured under the clip and spring. Hmm, it did seem like a jetting problem, but not the needle this time. If the main jet was clogged, surely it would run lean, not rich?

Maybe the engine was just cooked? I gave it some time to cool down, with the plug out, cleaned everything up again, reset the idle mixture to 2 turns out, and had another go at getting home.

Bizarrely, the bike ran fine at idle and up to about 1/8th throttle, but on 1/4 throttle it just choked and faltered. I was quite impressed that it managed to get up to 30, nearly 40 downhill, on 1/8th throttle, and I managed to route through some industrial estates rather than holding up traffic on the big roads.

Eventually, I nursed it into my work car park, but with a big hill between me and home, Something Must Be Done. I was swithering between admitting defeat and calling my rescue service, or even shoving the bike into the work foyer overnight, but manned up and went for the carb strip. This is perfectly possible at roadside with pliers and a small Phillips bit, just take care not to lose any screw or nuts.

With it all apart, the cause was suddenly and glaringly obvious:


[Dramatisation]

Yup, the main jet had actually fallen off and was lying in the float bowl. That explained the behaviour fully - with no jet in the tube, as soon as the needle was raised, fuel was flooding up into the carb.

Huh, typical Chinese quality control! By which I mean that the stock 90 jet was fitted just fine, but some chump must not have tightened up the 95 jet that I - I mean, he or she - replaced it with.

Ah well, adventure over. With the jet secured properly, the bike immediately ran fine again.

The lesson here is that these bikes really are idiot proof, if the idiot can just stop mucking around with them.

So, no more fiddling, I promise. Well, I mean after I try the 100 and 105 jets again...


(*) Should Plod ever argues the toss with you about carring a multitool with a knife blade, please do remember this phrase: folding pocket knife with a cutting edge not exceeding 75mm/3", and I'll be having it back with an apology after I speak to the duty solicitor.

Thursday, 4 February 2010

And the performance is... is.... iiiiiiiis...


But first, some more ẁorship at the temple of LED.

The lower spots (£15 delivered!) came with a nice LED ring but 55W halogen foglight main bulbs. There was no way I was going to traumatise my poor little dynamo and battery by wiring in another 110W of load, but fortunately there are LED equivalents for the H3 type bulbs.

As you can see, they're tecno-tastic. It's like living in a bright bluish-white Futureworld. The moment there's a LED equivalent of the Xenon BA20D headlight bulb, I'll be on it like Angelina Jolie on an African orphanage.

But that's not why we're here, is it? It's to find out if de-catting the bike made any difference to the performance. Well, did it? Did it? Wait - why am I asking you? I'm the one who knows.

The glaciers withdrew briefly today, and I went for a lunchtime drag along the handy local dual carriageway. Up the on-ramp, feeling good, 30mph, 40, and an indicated 50 as I hit the main carriageway. Throttle pegged, here comes 55, and the 60-ish that's the usual top end. But wait - what's this? Do we see 65? We do! Do we see 70? Near as dammit, we do, in 5th and a fraction over 10,000 RPM. That's more like a real 65, but it's comfortably faster than the bike has ever shown on the flat, enough to keep up with the traffic and safely overtake Micra Man.

So we're clear, that's the purpose of getting that little bit of extra performance. It's not about burning rubber on the shopping trip, it's about the difference between holding up and keeping up with cars on open roads. Slower isn't safer if it means you're being tailgated by Astra Man.

For those keeping score, that's with a 17 tooth front sprocket, stock CDI, aftermarket coil and HT lead, a K&N stylee filter, 95 main jet and a DR8EIX plug (DR9EIX is a better for extended high RPM). Now that the engine can exhale, I'll re-try the 100 and 105 jets to see if the needle can go into the Forbidden Zone past 70.

So, was chopping the cats worth it? I'd say yes, but only because I did it on the cheap and enjoyed the process. If you had to pay for 2 aftermarket exhausts - assuming that you could find ones that were definitely cat-free - would it really be worth spending 1/5th or more of the price of the bike to get another 3 or 4 mph?

That's up to you to decide, gentle reader. I can only write my own tale. What's yours?

Sunday, 31 January 2010

Operation Convert Bike To Sparks: success!


Sacrifice to the Gods of Entropy and they may eat you last.

Things that I have learned:


  1. 1.5mm mild steel is arc weldable, but not necessarily by me.
  2. Sometimes, close enough isn't good enough.
  3. There's nothing you can damage with an arc welder that can't be fixed with an angle grinder, or vice versa.


My first attempt at welding in a section of pipe wasn't a total success. I used 38mm OD 1.5mm mild steel (35mm ID), which is at the lower end of what's arc weldable. Cut to the chase, I got it butchered together, but made a serious snafu: once it was all welded up, the exhaust plain didn't fit, no matter much much I swore, pleaded, or tried to negotiate with it.

I did a fair bit of offering up, then removing, tacking and re-offering but made one fatal error - I didn't tighten up the manifold nuts when offering the exhaust up. Consider that a few degrees of difference at the manifold means an inch or so at the tail joint. One I had it all welded solid, I could choose between a tight seal at the manifold and a clear 1" gap at the tail, or have the exhaust bolted on but spitting from the manifold.

In the event, I called a Mulligan, and decided to do it over. Since I'd burned through so much of the 1.5mm tube, I decided to go bigger. 2mm would likely be OK, but I wanted to be sure and went to 3.2mm, with an OD of 42.4mm = ID of 36mm. This was likely too big; an ID of 33 or 34mm would be a snugger fit, but you can always narrow wide pipe down.

First things first. This time, I'd be doing some serious welding with the exhaust on the bike, so the tank and battery had to be removed and buried 6' deep (well, balanced on top of the bins out the back, anyway):


Then I ground off the 1.5mm pipe section from the left hand pipe. As always, it took longer than I'd expected, and there must have been a small earthquake or similar, as I... uh... ground almost all the way through at one point. Mind Control Lasers, maybe.

Aaaaanyway. Remember the adage: welding can fix anything that an angle grinder messes up, and t'other way around too. A bit of 1.5mm patching over it covered up the evil. Let's never speak of it again.

I cut the the 3mm pipe to 1" longer than the removed section of cat-pipe. Another mistake I'd made the first time round was to make the replacement pipe too long. This meant that it went too far up the curve of the pipe on both ends, which contributed to screwing up the angles. See, I do learn, eventually.

Then each end of the pipe needed notches cut so that I could narrow it in. I'd recommend hacksawing these, rather than grinding them out, since the narrower they are, the easier it'll be to make them gas tight later:


Another lesson learned - this time I bolted the downpipe on solidly before even thinking about fitting the pipe. Note the car jack holding the lower section up at approximately the right height:


Then the ends of pipe section could be gradually narrowed down and offered up until it was fairly tight over both ends. I had to remove the whole assembly to bang it down tight. That's where your Anvil Shaped Object comes in handy. You do have an Anvil Shaped Object, right?

Once the new pipe was as tight as I could get it around the original exhaust, it all went back on again, and both ends of the exhaust were solidly attached. For those playing along at home: solidly attach both ends.

Then and only then did I weld up the joints. Rather than just tacking, I manned up and welded as much as I could manage in place. (Pro tip: remove the brake pedal on the right side to get more access to the bottom weld).

Only when I'd gone as far round the pipe as I could manage did I remove it. The unwelded parts of the pipe ends needed banging down again to get as tight a fit as possible. And the first thing I did then was to put it back on and check that it still fitted. See? Learning! See?

With everything seemingly OK, I removed the exhaust again and finally finished the welding. In my pre-emptive defence, it's a fiddly job, as you have to move the rod in 3 axes: rotate around the pipe, oscillate up and down to cover the joint, and move the rod in as it melts down. Very zen. Then there's the 8 notches in each end, 32 in all, that need sealed up. About 65 amps with a 2mm rod, for those taking notes.

Not the nicest welds in the world, but no, since you ask, I'm not planning on giving up my day job:


Fast forward, the 2nd exhaust went the same way, and a lot faster, since it was just a production line now. The bike fired up fine, this time with the exhausts seated properly. I found a few pinhole leaks, but they were quickly welded over, and some grinding neatened the welds up some:


...although they still need filing, filling and sanding before I paint over them, and I won't finalise that until I get a chance to take the bike out for a run. As usual for this winter, there's a localised Fimbulwinter on the stretch of road right outside my house. Hopefully my de-catted Penguin Murderatron will contribute to this alleged global warming which we could really do with round about now.

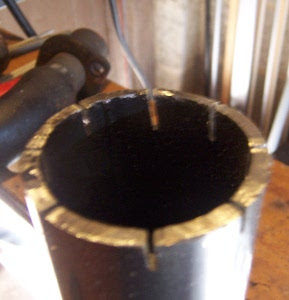
Speaking of which, here's one of the offending, offensive cats, the one that I didn't try and drill though:


You might think it wouldn't be hard to drill right through that. Well, think it all you like. It's harder than a scrap-yard dog with a flick knife.

Well, that's us 90% done. If I was doing it again, I'd try and get some 33 or 34mm ID 2mm pipe. Also, I wouldn't do it at all.

But since it's done, all that remains is a road test to see if I've helped, harmed or not done a damn thing to the performance. Nobody laugh; it could have helped it breathe. You'll see. You'll all see.

Sunday, 17 January 2010

Catalytic cutting catastrophe

But first, Previously On Bike-in-a-box-blog.

Measure twice, cut once, goes the mantra. Well, in an uncharacteristic display of common sense, I only drilled once before measuring the choke assembly.


The small metal widget in the top right is the actual choke actuator, which rotates to operate the choke inside the carb. Note the shiny new hole drilled in it, where I was going to attach a choke cable. Note also that with the plastic choke lever down (i.e. choke off), the actuator is raised. Annoyingly, it's sprung so that without being held up there in the off position, it would spring down and turn the choke being fully on. This is pretty shoddy design to begin with - if the choke assembly fails for any reason, the choke will come on full. Not good. Note that this is on a Japanese Mikuni carb emulating the behaviour of the Japanese designed CG125: I don't think a Chinese design would be as fail-fragile.

The show stopper is that the actuator needs to be pulled up in order to turn the choke off. However, all sane choke knobs are pulled up to turn the choke on. I'd have to reverse the direction, which could be done by attaching the cable to the plastic choke lever instead. However, the lever isn't sprung, and would require the choke cable to not only pull it up, but to positively push it back down again, which wasn't going to happen.

I tried fettling it various ways but couldn't find an arrangement that would operate the actuator correctly and reliably (i.e. stop the choke from springing on), so I declared it a draw and shelved the idea.

Decatalysing, Round One

Guru Forchetto from defunct TheChineseBikeForum always held that the cheap basic catalytic converters fitted to our bikes were one of the primary causes of the drop in torque and power from their original configuration. Arguments about exhaust baffles and back pressure and two exhausts versus one aside, it's undeniable that these engines were not designed with cats in mind, so it's worth a try. The polar bears can just deal with it. What have they done for me lately?

So I've had a plan for some time to de-cat my bike, and this weekend saw it swing, saw and weld into action. This may turn out to be a mini series in its own right.

First, where and how to cut? From doing a bit of wikiing I'd hoped that the cat would be a relatively fragile ceramic, that I'd be able to drill, chisel or just smash to pieces by going in at one end.

So I decided to make a straight cut just under the cat bulge. First, I drew a couple of lines across the cut so that I could match up the orientation again later - this turned out to be pointless because the amount of handling required quickly erased them, but not a disaster as it's easy enough to offer the pieces back up again and re-mark them prior to welding.

A hacksaw went through quite easily, and I was pleased to find that the mild steel is a good 2mm thick, and thus OK to arc-weld back together again.

It turns out that inside the pipe there's an inner pipe of slightly smaller diameter. I'm not sure what the purpose of this is; probably some sort of circulatory magic gubbins. In the event, I inadvertently lopped off an inch or so of it, which I just discarded rather than trying to weld it back on.

This exposed the end of the cat bulge and the cat lurking inside. It starts 3/4" or so inside the bulge, and looks like... well, I'll take a picture first next time. It's a honeycomb structure that looks to be stainless steel, but very fragile, so in I went with a 20mm wood-hole cutting drill bit, expecting it to shred fairly easily.

Hmm. Er. Mmmm. Nope.

The honeycomb immediately flattened and toughened up and the bit was just polishing it. OK, switch to an 8mm HSS metal bit. That went in 1" or so, and that's all she wrote. I drilled a few such holes, but they weren't anywhere near close to going right through the cat. Pressing hard resulted in another 1/8" penetration and a glowing red bit tip. Oh my.

Next up was a curved chisel, which I whacked into the cat around the edges to see if I could detach it from the pipe walls and just pull it out. It went in 2" or so, and I managed to deform the cat a fair bit and pull some small lumps out with pliers before the chisel, well, snapped clean off while I was wiggling it around.

OK, rethink. If I couldn't get it out from the end, what if I cut the cat bulge in half in the middle? I might be able to chisel the half-cat out from either end and pull them out. So in with the hacksaw, which went through the pipe wall, hit the cat and... that's all she wrote (again). I just couldn't get through it.

After some more bashing, whacking, stabbing and hammering, I had to acknowledge that all I was doing was choking up the cat, and called it a night before I made things worse. These things are tough:


Note the snapped off chisel at the bottom!

That left me with a butchered cat, and a half-cut pipe. I wanted to get the bike back the road, so decided to just weld it all back up, and source some pipe to replace the whole cat bulge with, rather than trying to remove the cat and retain the pipe.

My welding is... well, weld is as weld does. If it holds, it's a good 'un.


Not the best weld in the world, but it's been a while since I did one. That's using a 1.6mm rod and about 50 amps; I didn't want to blow right through the steel. Actually though, I reckon it could stand a 2mm rod and 60+ amps, which I'll use when I replace the pipe.

Getting the main weld right was a bit of a fuss. Putting the pieces back on the bike and marking the join was simple enough, but I'd cut too close to the bulge, and hadn't enough straight pipe on the cat side to get a clamp on the pieces. In the event, I had to hold the pieces together while tacking them, sans face shield, and just wearing clear goggles to protect from weld splatter.


I got it eventually though, and butchered my way around the join, brushing and grinding it down and going around a few times to try and get it solid - I should have switched to 2mm sticks, really.

Well, good enough. It'll only have to hold until I get the pipe.


I'm not even going to paint over it, since I'll just be cutting and re-doing it soon anyway.

Despite the choked up cat, the bike started and ran fine. The weld is gas tight, and the exhaust didn't drop off, so job done.

I'll get some pipe with an ID that matches the OD of the main pipe, so that I can sleeve it over it (much like the cat bulge) rather than trying to weld a piece inline; that's unnecessarily tricky. Having it sleeved will also make it easier to keep it together while I tack it and offer it up.

Well, not a success, but not a disaster either, and I did achieve my real objective: Welding Stuff.

Welding Stuff is all that separates us from the animals. That, and blogging.