Ask how big a garage you need to store them.
For 10 points, which lying liar lied these lies?
I really don't need a bigger bike for my commute or pleasure jaunts, so unless I plan some touring in this year, I'll be sticking with my 'Firebird'.
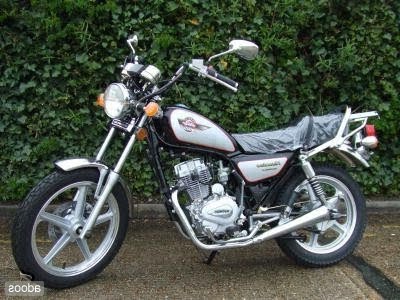
Well, that lasted all of a week. My head was turned by the jaunty number pictured above, a Lifan LF250-B. For all intents and purposes, it
is a Yamaha Virago XV250. I suspect that Lifan bought the jigs when Yamaha stopped making the Virago, and just started churning them out themselves. It needed a bit of minor maintenance to correct some neglect - it had been stored outside, and the right side of it had suffered a little from the weather - but it's substantially sound, and feels well made.
First order of business was an oil change, to Halford's 5W-40 synthetic motorcycle oil. The oil in it was quite emulsified (creamy looking) which is consistent with it being used for short runs, as the previous owner admitted glumly - we both need longer commutes to work - maybe we should swap jobs? I got it home OK, but when testing the rear brake light sensor (which didn't work), I snapped the rear brake cable, which was rusted and clogged up with crud. Ah well. ChineseMotorcyclePartsOnline got me a next-day replacement, and the sensor switch just needed a strip and clean. The chain and engine got a good scrub down with Gunk engine cleaner; the amount of road crud under the front sprocket cover was unbelievable: I think I hit a layer with dinosaur fossils in it.
Job's a good 'un now though, and the Firebird got another oil change while I was at it, at 4400km. That makes... um...
lots. I've lost count, but it's more frequent than every 1000km, that's for darn sure.
Back to the
Virago Lifan. The previous owner slapped those YAMAHA stickies on the tank - did a good job of it too, they were very convincing, but the first thing I did after taking this picture was to strip them off. Who wants to be seen riding one of those madly overpriced Japanese bikes?
On the plus side, it's got a splendid 250 v-twin engine, smooth, torquey, and surprisingly quiet. It feels like a much more grown up bike. However, the riding position is very different to the Firebird - lower, with feet forward controls, and a bigger reach to the bars. The Firebird is comfier and far easier to ride, which - to be honest - makes it more fun. It's just so light - in weight, handling, gearshift and clutch - that it feels like a pushbike in comparison to the Lifan. My appreciation for the Firebird just grows with experience.
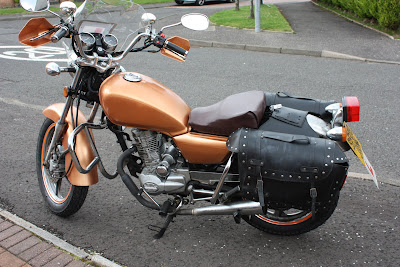
Of course, that hasn't stopped me stripping it for parts. The pimp panniers and tool roll went straight on to the Lifan, and the Firebird got its old cheap fabric panniers back. Those keeping score will also note that the Firebird has its stock seat and rear rack back as well. Those with x-ray vision will have spotted that I've also put the stock air box back in as well in place of the cone filter. This is to quieten the bike down a bit: it sounded a bit hooligan next to the more refined Lifan.
Now, I'm not done with the Firebird yet. I'll be keeping it for some time, for a couple of reasons.
The first is that I plan to bob it. Look, it's a proper Plan, with bullet points and all.
- Remove the add ons: screen, spotslights, front and rear crash bars.
- Start stripping the stock parts: remove or shorten the front mudguard, remove the seat and rear rack.
- Replace the handlebars with lower, shorter ones.
- Cut off half the rear mudguard, and mount it on the swing-arm.
- Cut off the frame behind the rear shock mounts
- Remove the side panels, mount the battery lower down, cut the horizontal frame members at the rear vertical member, and angle them down to make room for a lower solo seat.
- Replace the headlight with a smaller one.
- Shorten the front indicators. Shorten the rears and remount them near the shock mounts.
- Put the rear light and license plate on the side of the bike.
The goal is to move towards this look (but with flat bars):

Unfortunately, there's a spanner in the works. Don't tell her I called her that though.

Yes, that's
barely legal hot wife-on-bike action! Turns out she's bike-curious, so I've been taking her for secret dates on the local industrial estate, so she can practice wrapping her thighs around a throbbing powerhouse. Then I let her have a go on the Firebird.