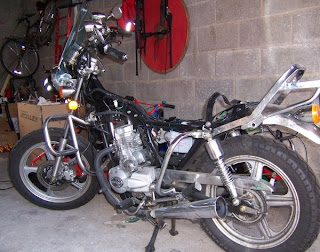
Thursday 10 December 2009

Bend like the reed, don't break like the oak.

In other words - I give up. The hot rubber smell is still present, but I can't determine a cause. The bike is running absolutely fine, with no hint of clutch slip, and I can't think of any other cause.

So we'll shove it on the To Do list, along with the stripped sump threads, for the first engine rebuild. While we're making that list, the exhaust is smelling slightly oily, so a piston ring replacement followed by a Mototune break-in is on there as well. I'm quite taken with the idea of a hard initial run-in to seal piston rings, and am regretting running my bike in so gently.

All that said, it is running great - I'm really just looking for excuses to strip the engine.

While I await the joyous day, it's back to more fiddling with lights.


The speedo bulb developed an intermittent fault which steadily got worse until it gave up altogether. Obviously, my legal team leapt into action and served a writ of habeus judice under the Statutory European Human Consumer Rights Act, demanding a replacement of the entire bike, £50,000 in inconvenience and legal costs, and a hundred beelyon dollars in punitive damages.

While I wait for that to play out in Brussels, I popped the speedo unit out for a look. There are two nuts underneath that hold the unit together. With them removed, the top lifts out - itself a sealed unit - exposing the light bulb at the back. Some fiddling revealed that it was just a loose fit between the bulb and the holder, just a casualty of vibration. But since I had it off, I went all LED, all the way. The princely sum of £6 secured 6 x T10 501 round top LED bulbs, which are now fitted to the speedo, tacho, indicator, neutral and full beam lights.


They're a definite improvement in the centre console; the overall light output is probably similar to the 2W incandescents that they replace, but it's much more directional, which is ideal for these mounts. In the dial consoles, the advantage isn't so clear. The top of the dials are better illuminated, but the bottoms less so. Still, the important speeds are at the top, so I'm OK with that.

So I'd recommend replacing the incandescents with LEDs, but would suggest using larger wide-angle caps for the dial controls.

Next on the project list is fitting a choke cable. The choke is mounted directly on the carb, and it's fiddly reaching under there to flip it, especially in the dark, with thick gloves on - i.e. in winter, when you actually need it.

So I've bought a universal choke cable, sold for use on Minis.


I reckon it should be possible to finagle this onto the bike somehow to remote operate the existing lever, although it'll need shortening, and mounting brackets fabbed up. Mmm, fabbed. Let's all say it together; faaaaabbed.

Saturday 14 November 2009

Listen... you smell something?


Some exaggeration for effect may be in evidence.

Where I been at, I hear you ask? I been at one with my bike, just tripping and... uh... gripping and... such-like. I think in the near future, we can only expect updates when things go awry.

Up until this week, things have been non-awry. I haven't managed any more mini-epics, just commutes and pleasure jaunts. The bike has been behaving itself just fine, although the tyres are not great in the wet, and roundabouts need to be treated with serious respect - I've had a foot down to correct a wobble. Woke the cagers up, anyway.

However, this week has brought a potential new issue, a mild cooking smell. It's a 'hot' smell rather than sharp burning, is evident even after short runs, and it smells vaguely rubbery. There's nothing binding on the wheels, and I can't find anything touching the engine, although it does seem to be coming from down there. So, internal then.

I suspect the clutch, particularly with the switch to fully synthetic oil and the Activ8 treatment that I did a while back, but if it's that, then it's taken a long time to start slipping. I've adjusted it up, and there's no feel or sound of slipping evident.

Well, first port of call was another oil change today, still with 5W-40 synthetic, but the smell still seems to be evident. Then it stalled entering a roundabout, just faltered, popped and died. OK, I was being a bit limp-wristed, and it started right up again, but we're not having that.

The other thing that occurs then is the valve clearances. I've had them tighten up to nothing once before, as did SteveF on the Chinese Bike Forum, and they are suspiciously quiet at the moment. First thing tomorrow, it'll be off with the rocker cover and out with the feeler gauges. Then we shall see what we shall see. Oh yes, we shall. See, I mean.

Thursday 10 September 2009

Intensify forward lightpower!


I don't want anything getting through...

...'specially geezers in Kias.

Well, what do you expect? The bike's running like a dream, so I was left with no choice but to add some more bits. No choice, I tell you.

The two new lights are the ones below the headlight. They're fitted to a bar that's bolted on to the mounts that were used by the stock "Huoniao" badge, and were a steal at just £15 for the pair including delivery. There's a LED light-ring round the edge, and 55W 'halogen' (apparently) bulbs. I've only wired up the LEDs just now, since I'm already running a 55W headlight, and 175W or so total in lights would be asking way too much from the plucky little generator and battery. I may wire the 'halogens' up to the full beam switch as brief "flasher" lights for saying "hello" to other bikers - or "HERE I AM!" to cagers, for that matter. The more presence, the better.

In servicing news, I did another oil change at 2880Km or so. I think it's the 6th change in total. I've been getting some clutch drag with Halfords 10W-40 semi synthetic motorcycle oil, so went for their 5W-40 fully synthetic. Verdict: yes. It's subjective, but the bike feels a little quieter and smoother, and the clutch drag is definitely decreased. With the 10W-40 semi, when the engine was hot, I had to kick up from 1st to 2nd and then back down to get neutral, but now I can go from 1st to neutral more easily.

The cut-down DPR8EA-9 plug was working just fine, but I got the eBay itch and grabbed a DR8EIX (I had a DPR9EIX-9 in for the Lang Way Roond). The starting and warming up with the iridium plug is great, and in conjunction with the 5W-40, the low speed running is really steady, with no hint of hesitation or roughness, and less clutch grab. We're only talking about a marginal improvement, but it all helps with confidence at low speed. Which as we all know - or will find out eventually - is where you're most likely to drop the bike.

Speaking of which, a work chumrade (not the Lang Way Roondie) has just bought a spanking new Suzuki Bandit GSF650S. Lovely bike, absolutely lovely. And heavy. Really heavy. And I've got these short Scotch legs and... well... I dropped it in the work car park. With 90 miles on it.

I'm going to hell.

On the bright side, the bits to fix the right side (indicator, brake lever, mirror) were surprisingly cheap, and hey, now I own part of a Big Boy Bike. Plus as a salve to my conscience, he then dropped it at some lights, on the left side, so at least it's nicely symmetrical again.

Unfortunately, I really do think I'm reaching the end of what I can do with the Huonaio[*], short of grinding and welding, so it may be time to start thinking about sitting a test. Not necessarily so that I can get a bigger bike, but it's an easy piston swap to a 150cc, or we could give it large to 200 or 233cc.

You gotta have a dream, don't you?

[*] davidqc over at the Chinese Bike Forum turned up the trouser-stiffening info that Huoniao means Firebird. Hmm... Firebird HN125-8. Sounds much studlier.

Tuesday 25 August 2009

A quick quickie


Aaaah, that's the stuff. The stars have aligned themselves advantageously, and the bike feels the strongest it's been yet. To recap, we're currently on:

Halfords 10W 40 semi synthetic oil.
Activ-8 friction reducer.
K&N cone air filter
95 main jet (down from 100)
Needle in centre position (down from 2 up and 1 up)
Idle screw about 2 turns out
DPR8EA-9 plug with the earth electrode cut back.
97 octane fuel
Stock CDI
Aftermarket coil.

There we go. I did file the electrode back a little more, and it doesn't seem to have harmed it (yet). Now the bike is happy all the way through the rev range, pulls away strong, revs smoothly right up to 10,500 and the plug is staying clean. It's perhaps a little too clean, and I may go back to a 100 jet or raise the needle, but for my current short commutes it's probably good enough.

Today's purchase was 5 Metrics of Halford's 5W 40 fully synthetic oil. I had a look at Castrol Power 1 GPS 4T 10W-40, but it's 4 Metrics for the same price and only semi-synthetic. I want to give filthy Nature a body-swerve on the next oil change to see if I can reduce the clutch drag a little.

I'm modest to a fault
I feel that it's my duty to mention again how much positive attention this cheap little hack gets from other bikers. A Honda CB750 pilot - a proper classic bike, so obviously a discerning chap - collared me at the shops to enquire about it. Apparently it's a "really tidy little bike", a epithet with which I can only concur.

Sunday 23 August 2009

Poor bike. Poor, poor bike. When will the madness end?

More entries in the Catalogue of Foot Shooting.

Bondage
The rear of the leather panniers on the bike would rub against the wheel given their druthers, so I made up an aluminium bracket to hold them away from it. It's a W shape, attached to what were the rear seat/luggage rack mounting points, with the centre of the W being an arch over the wheel. When I first made it, the arch was right up under the rear mudguard, giving plenty of clearance. However, after putting the custom seat on, the panniers are now slung directly on the rear mudguard, and are sitting lower down (which is generally a Good Thing). I had to extend the left and right corners of the W down, which meant "stealing" some length from the supporting arch. I thought it was still comfortably high enough...

You can probably guess the rest. Spotting a big ditch in the road, I stood up to smooth the ride. With the rear unloaded, the wheel jumped up, caught the centre of the aluminium bracket, and dragged it around - I mean, it actually pulled it into a U shape, until the bracket ended up wrapped around the front of the wheel.

Screeeeech, went the wheel as it locked up hard. I'm happy to report that I held it up, even got the clutch in and kept the engine running.

There was a little cosmetic damage to the ring over the sprocket, but the bike seems to have survived the incident just fine. I've kept and sorted the bracket - the panniers need something to hold them apart - but now the arch is running behind the wheel rather than over it. All seems OK so far, but it's something else to keep an eye on though.

Smut
The bike has been bogging down at idle, and every time I've pulled the plug (DPR9EIX-9) it's been sooted up badly. I changed the 100 jet (stock was 90) down to a 95, and leaned the idle out, but to no avail. Suspecting that the D*9* was running too cool (it transfers heat to the engine faster than a D*8*), I rustled up a spare non Iridium plug that I happened to have lying around, a DPR8EA-9. Something I've been meaning to try on a plug is cutting the earth electrode back so that the spark jumps diagonally. The idea is that this exposes the spark more fully to the fuel-air mixture and allows better combustion, rather than having to flow around the electrode. The effect - if any - is probably minimal, but this is a Project Bike, so here goes:


It's rather conservative; there's still some overlap of the electrodes. I think I'll trim it back a little more - you know, until it stops working. Note that the gap between the terminals should still be 0.6 - 0.7mm, just diagonally rather than flat.

Verdict: well, it works. I won't say that it works any better, but the bike started and ran just fine up to 10,000rpm, so if you fancy a fiddle, I'd say go for it. It'll give you something to bore the missus with, if nothing else. Update: my missus just read this entry, so Mission Accomplished.

Slipped disc
After my ride to test the trimmed plug, I pulled it and it was already sooty as a chimney sweep's nostril. Something's not right here, thinks I. I'd already moved the needle back from raised one slot to the centre slot, but pulled the slide to lower it again.

Ah hah! When I disassembled it, I found that the spring clip that should sit on top of the needle circlip and hold it down had found its way underneath the circlip - in other words, the needle was sitting way too high, and there was actually nothing holding it down except for the wafer-thin grasp of gravity. That explains the sooting, although the mystery of why I can't leave well enough alone remains unsolved.

This spring clip is really fiddly to fit, but I took my time with it and got it solidly in place, with the needle left in its stock centre position. Tomorrow will tell whether I've managed to "improve" the bike all the way back to its out-of-the-box performance. It could happen!

Wednesday 12 August 2009

How low can you go?


How's that looking? Speak up? "Super Pimp", you say? Well, if you insist.

That's a custom seat made from a piece of spare floorboard, some upholstery foam, and cheap (but surprisingly nice) brown vinyl, courtesy of eBay again. It slots into the retaining groove at the front, and has two bolts and wing nuts holding it down at the back. It'll need a bit of re-jigging, but is basically sound, if not quite as supportive as the original. I may put another layer of foam in, as it's only medium density.

In other news, the bike was bogging down at idle and low revs. Pulling the plug after a period of idle revealed it to be blacker than a parking warden's heart, which I've attempted to sort by leaning out the idle mixture substantially. I'd forgotten that I'd been creeping it richer and richer during the Lang Way Roond to try and keep the engine cool (through evaporative cooling) but had taken a good thing too far. Now I'm running it really lean for a bit to see if I can find a happy medium. I suspect that I should be using the choke for a minute or so in the morning, rather than running it so rich that it doesn't need any choke while cold. Further bulletins as events warrant.

And in a further bout of en-tweakening, I've replaced the aftermarket "POSH" branded CDI with the stock one. The bike is very slightly less eager between 5000-7000 rpm, but runs smoother above 8500rpm, where the POSH was missing, allowing a higher push in 4th gear before the shift to 5th. I think the POSH was staying too advanced at high rpm, lowering the top speed. Xian now do a "Kamizake" CDI which they've developed themselves with testing from Forchetto from the Chinese Bike Forum. I may give that a try to see if it gives the best of both worlds.

Wednesday 29 July 2009

Oops, I did it again


I whipped the seat off today, and the (probable) cause of the weird missing problem was immediately obvious. I've fitted an aftermarket POSH CDI, which is larger than the stock CDI and consequently needs a custom securing solution. I'd just wired it in place to the frame at the front of the seat area with the connector (actually a plug converter) supported on top of the mount that the old air box had attached to. So when I put weight on the front of the seat, it pushed the CDI down and strained the connector. D'oh.

That seems to match the symptoms that I'd been experiencing, and a quick re-positioning of the CDI seems to have sorted it, although I'll need to do another long run to confirm that. While I was fiddling, I adjusted and lubed the chain (it was seriously slack after the Truncated Way Roond), nudged the pre-load on the rear shocks up one notch and put the carb needle back to the middle position, since the bike had a thirst on it on the last leg home.

So yet again I've self-inflicted a problem on the bike. If I'd just leave it alone, it'd be fine. But where's the fun in that?

Tuesday 28 July 2009

WIN!

(partial)


This is a £720 (+ pimping) Chinese bike half way up the 20% gradient Applecross pass, shortly before tailgating a Jeep up the rest of the way.

The Issues that dogged day #3 seem to be in hand, and minor. Here's the story.

I dropped the bike on day #3 (while dismounting, obviously) and later that day, it started missing pretty badly when it was hot and under throttle. It also had real problems pulling away from a stop, backfiring and dying in 1st gear unless I thorougly thrashed it (like, 7000rpm) and let the clutch out verrrrry slowly.

Fix attempt #1 was to pop the rocker cover and check the tappet clearances, which seemed fine (i.e. there were some, but I didn't bring feeler gauges). I loosened both tappets another 1/2 turn to be sure, and checked that there was an audible buzz.

The bike was just fine when cold, and started off strongly. However, when it had heated up, the problem came back in spades, and I this time I noticed that it was missing noticeably whenever it hit a bump in the road. Very curious. I suspected fuel issues because of that.

Fix attempt #2 was to strip the carb, check that fuel was getting to it, that the floats were free and the jets weren't blocked. While I had it apart, I richened the idle mixture a little more, and raised the needle one notch - I'd previously put it back to the centre position. All seemed fine, so again we carried on.

Oh dear. The bike hopped and staggered its way on to the remote village of Kinlochewe, where I charmed the natives into revealing that there was a Man Who Fixes Motors round the back of his (unsigned) farmhouse just up the road. After another cooldown, I thrashed the bike to within 200 yards of said house, when it just up and died. It was then a push-job to get it to the surprisingly well equipped little garage, where the spanner monkey highly skilled professional initially said "I don't do bikes" until I engaged his interest by assuring him that it was really primitive and old skool, and going through the things that I'd tried.

We had a good fifteen minutes of prodding and poking, with the bike (again) starting and running absolutely fine while cold, and refusing to misbehave. Eventually, the Man Who Fixes Motors noticed that the spade connectors on both the coil and rectifier were loose, and crimped them up. Off I went for a quick test run, expecting the bike to die any second, which it absolutely... didn't.

RESULT!

So just crimping the connectors seems to have sorted the missing problem, at least while running, and at least when I'm sitting towards the back of the seat. Yes, it's that weird. When I shift my weight to the front of the seat, the bike stumbles. You know what I'm thinking? The accursed side stand cutout switch, which I'd "cleverly" relocated under the seat...

Unfortunately, my confidence had taken a knock, so we bailed on our John O'Groats aspirations and headed back for civilisation, in the form of Inverness. You can tell that it's civilised because there's nowhere to park. We made it there, and slightly past, to Fort Augustus on day #3, then pushed the other 150 miles home on day #4.

There's not a lot to tell from the last day, since it was almost all on the A82. It's a nice enough road, with some stunning sights, but the winds down Glencoe were just vile, and it was a relief to get past there and into the central belt.

I'm confident that once I get the seat off, there will just be a bit of loose wiring to find and fix and the bike will be pristine again.

Overall, I'd say it did very well. It was caned on and off for 4 days solid while carrying a significant load, often in excess of an indicated 50mph with the throttle pegged up Ben and down Glen. The only wobble in the whole trip was when I hit a wet cattle grid at a slight angle and was forced to correct. Contrast with my chumrade's CBR125 which was reportedly quite twitchy in the bends, especially in a crosswind, so that said chumrade was slightly slower through the twisty stuff. On the other hand, while I was pegging it in 4th up a hill trying to reach 50mph, he got bored and just zoomed past, so fair play to the little Devil Machine.

We both had a blast, enjoyed our bikes, met some interesting people (fully half of whom weren't nutters) and saw some astonishing places. I've lived in Scotland all my life, but haven't seen more than a tiny part of it as an adult, mostly the central belt and A9 corridor. There's much more to see, and a bike is a brilliant way to see it. What are you waiting for?

Monday 27 July 2009

Lang Way Roond: truncated


I had a delighted call from Mr Borg this morning - they were in Applecross having tootled over this rather nice road and had an absolute blast. Apparently he doesn't mind single-track roads now, not on his motorbike in any case. Next stop was due to be Ullapool.


Alas a text at teatime revealed things had not proceeded according to plan, and they were in Inverness. Later this evening he called to elucidate - he was having bike troubles and had had to stop a number of times to tinker with it, eventually having to push it into a garage. He and the bloke in the garage managed to get it going again but he didn't feel confident in crossing Mongolia heading into the remoter parts of Sutherland with it playing up so they'd made for Inverness, then headed down to Fort Augustus to a campsite.


They've decided to bail as Andrew's bike is also struggling a tad now and they're both knackered. But they've both had a great time and the trip is clearly labelled success from that point of view.

They're hoping to get home tomorrow, all being well, and he'll presumably update with pictures/stats/rants/road reviews himself.

Mileage = 279km or 173.3706 Mediaeval miles.
Running total distance = 279 + 210 + 349 = 838km or 520.7332 Renaissance miles.

Sunday 26 July 2009

"It's amazing scenery here - it really reminds me of Scotland."


Actually that's a picture I took at Loch Morlich last week but as Mr Borg informed me in today's telephonic update that it was a little rainy I thought this'd be appropriate.

Stats for the day:

Sheep - 4 (seen? run over? he didn't specify).
Dolphins - 4.
Rain - ALL.
Drops - 0.
Falls - 0.
Gearshifts fixed - 1.
Bikers met - 2.
Ex-bikers met - 3.
Knitting - FAIL.

Mileage: 2029 - yesterday's (1819) = 210km or 130.494 Prehistoric Miles.


This evening they've stopped at Kyle of Lochalsh, having travelled via Mallaig and taken the ferry to Skye. They took a little tootle around Skye - "Got to Portree, had a good pee, then turned back" and headed for the bridge. They stopped in Broadford to see if Teo's Handspun was open but it wasn't - 973 Excellent Husband Points for trying though. 'We were going to go to the Scary Fairy bit but were too scared' (No, I haven't the foggiest).

Oh yes, the title refers to Obi Wan McGregor's comments every ten miles or so of Long Way Round.

Saturday 25 July 2009

Lang Way Roond: the Beginning


"With great power comes great responsibility."

or

Mwahaha, revenge of the missus.
Blogging powers now passed over to Mrs Borg.

I've had several updates from Mr Borg today. He set off at around 9.40, the 9am start he'd predicted being, predictably, optimistic. They made it to Oban and then to Fort William in excellent time and were hoping to get to Mallaig before stopping for the evening. However they seem to have taken a very scenic route (by which I mean really, really the Lang Way Roond) involving sheep, via Strontian, after which strontium was named - must be true, both the sign-post and Wikipedia say so. They've given up for the night and are camping in Strontian in a campsite with facilities, i.e. showers. So they're not stinking yet.

Mallaig and Skye tomorrow, though Skye may be skipped depending on the weather. Roads are great (apart from the single-track sheep-infested highways that Mr Borg is not so keen on) and the scenery is likewise great and 'we really must go there together sometime'. This is going in print so I can remind him.

Some stats for the avid readership of this blog:
  • Helmet drops - Rogerborg 2, Chumrade 1
  • Bike drops - Rogerborg 0, Chumrade 1.
  • Mudguards jammed against wheel by weight of toolbag - Rogerborg 1.
  • Clutch adjustments - Rogerborg 1.
  • Textile panniers resting on exhaust downpipe - Rogerborg 2.
  • Panniers fixed - Rogerborg 2.
  • Sheep on road avoided - ALL.
  • Sheep hit - 0.
  • Distance travelled - 1819-1470 km = 349 km = approx. 216 Old Folks' Miles.
  • Sump plugs lost - 0.
  • Campervans overtaken - 1.

Friday 24 July 2009

Lang Way Roond: the Inventorising


Keep away from the baggage, foul denizens of Ullapool, lest I send you back to the frozen Hell from whence you sprang!


Bike #1: Huonaio HN125-8
1 x bike-in-a-box, some modifications, just serviced
1 x rider, containing spunk, possibly gumption
1 x pair textile panniers
1 x pair of large leather panniers
1 x backpack
1 x cargo net
1 x pair motocross boots
1 x pair thin canvas shoes
4 x cotton/synthetic shorts
1 x pair Sealskinz(tm) waterproof socks
5 x pairs anti bacterial sports socks
2 x cotton vests
1 x synthetic T shirt
1 x synthetic long sleeved shirt
1 x textile jacket
1 x textile trousers
1 x back brace
1 x helmet (style still to be decided)
1 x neck/face warmer
1 x pair summer gloves
1 x pair waterproof winter gloves
1 x waterproof poncho
2 x emergency space foil blankets
1 x Gelert solo tent
1 x self inflating mat
1 x summer weight sleeping bag
1 x small angler's stool
1 x wind up LED torch
3 x disposable lighters
1 x eye mask
5 x pairs ear plugs
1 x roll toilet paper
1 x pack 80 baby wipes
1 x set eating utensils
1 x small umbrella
1 x talc
1 x antibiotic handwash
1 x factor 50 sunblock
1 x pack Immodium(tm)
1 x dry shampoo
1 x toothpaste
2 x toothbrushes
1 x deodorant
4 x anti-blister plasters
1 x roll sticking plaster
1 x multitool
1 x small chain (for chaining items to bike)
1 x disk lock / alarm
1 x collection of assorted nuts, bolts and washers
1 x junior hacksaw
1 x 1/4" socket set
2 x mole grips
2 x monkey wrenches
4 x assorted spanners
1 x set spare bulbs (including headlamp)
3 x assorted screwdrivers
1 x spare chain (428 / 118 links)
1 x set Allen keys
1 x plug spanner
1 x needle file (flat / half round)
1 x 12v power socket
1 x Cheap-O-Matictm sat nav
1 x 12VDC->240VDC + USB power inverter
1 x mobile telephone + charger
1 x Kodak DX7440 camera
1 x gas camping stove (can't find my petrol one)
1 x set camping pans
1 x backpack full of trail provisions (chocolate, spiced sausage, dried fruit, noodles, etc)
1 x hip flask with 1/4 pint malt whisky
1 x empty 5 litre can of petroleum distillate (to be filled during ride if it seems necessary to get us me through the Wilds)

Bike #2: Honda CG125
1 x silly overpriced miniature Japanese trinket, just serviced
1 x rider, containing optimism born of lack of experience
1 x pair teeny weeny "sports" panniers
1 x tank bag, effectively doubling the height of bike
1 x oversized 2 man technical tent
1 x giant squishy sleeping bag
1 x handkerchief
Perhaps some spare pants, although I wouldn't count on it

Let's riiiiiiide!

Really, really slowly.

Thursday 23 July 2009

Lang Way Roond: the Announcening


Inspired by such adventure biking legends as The Chinese Bike Forum's SteveF and his planned jaunt from London to Cape Town, and... uh... The Chinese Bike Forum's SteveF and his planned jaunt from London to Inverness, I'm going to be setting off on a mini-epic tour of Jockland next week.

I'll be teaming up with my workmate, fellow L'rner and (soon to be) staunch chumrade, Andrew, and his accursed Japanese devil machine, a Honda CBR 125.

The itinerary is (approximately) Glasgow -> West Coast -> Oban -> Mallaig -> Ferry to Skye -> Around Skye -> Bridge to Kyle of Lochalsh -> the sheep tracks up the West Coast, all the way round past Ullapool -> North Coast to Thurso and John O'Groats -> East Coast through Wick down to Inverness -> Speyside through Aberdeen -> Dundee -> Queensferry -> Back to Glasgow.

Well, that's the plan. Obstacles include one or both bikes exploding, running out of fuel half way up Sheep Fancier Pass, or being kidnapped by the six-toed locals in the back of beyond and locked in the cellar with their sister-daughters. Alternatively, having time called by the missus and having to cane it back home by the shortest route.

I'm figuring on an average of 40mph (and that's optimistic) with 4 hours riding a day, so 150 miles a day or thereabouts. That should see us finished in... uh... actually, I have no idea, since I haven't measured the distance. Preparation is for people with fat chested PR bunnies tucked away in their London command bunkers. I'm looking at you McGregor.

Win, lose or horrible Lovecraftian human sacrifice, it should be a trip to remember.

Next post (and the last before kick off) will be an inventory of gear. I'll be carrying most of it, since the CBR 125 is about the size of a razorblade, and Andrew has gone for "sports" panniers. I can fit two big leather panniers on the back, plus two small ones on my front crash bars, so I guess I'll be pack muling the loo roll and beers.

Tuesday 21 July 2009

Lube jobs and tappets and bolts, oh my.


Lube jobs and tappets and bolts, oh my.

Another long delay between updates, following the usual story: the bike won't die or throw a real hissy fit, no matter how actively or passively I neglect it.

In no particular order, I have...

...dumped some Activ 8 friction reducer in with the oil. The huddled fearful masses who haven't tried it will swear blind that it will wreck your clutch, cause your piston rings to give up the struggle, and inflict leprosy on your sons and your son's sons. Those who have tried it (well, SteveF from The Chinese Bike Forum, anyway) tell wondrous tales of increased response and improved power under load. This humble correspondent has noticed nothing, yet, with a 60ml to 950ml dose and several hundred km running. However, I've just done another oil change (well premature) and dumped another 60ml in the new oil, which is when Steve noticed the big improvement. We'll see - more of that in the next post.

...re-adjusted the tappets. SteveF (again!) noted that his tappets had closed up over the course of just 500km, to the tune of bending a pushrod. Steve really looks after his bike (or did until Codger Man wrote it off), and I'd noticed a loss of high rev power and a sinister silence at the end of a long run, so I whipped my top off and founds that my tappets did indeed have no - zero, nil, zilch, nada - gap, only a few hundred km after adjustment.

I gapped them again to the generous side of 0.08mm, and they've held steady this time after another few hundred km, although I haven't been doing any fast runs during that time. So the jury's still out on whether they're prone to major slippage during high rpm runs, or whether I'd simply badly mis-adjusted them in the previous service. Either way, the valves and pushrods seem to have survived the experience.

...replaced one of the stock chromed exhaust manifold nuts that dropped off when I was doing the test run after the tappet adjustment! Now, this one is definitely Idiot Rash, since I'd noticed the nuts slackening off, and done nothing about it. Given the expansion and contraction in that area, it's not really surprising, and I should have followed the Way of the Spring Washer. All the nuts are now washered up, and seem to be holding. Again though, I'm slacking, since I should have replaced the studs with the A2 steel that I've bought for the purpose. They are going to go, it's a common issue on these engines, and it's just a matter of when. I did have a tentative go at removing them, but they're pretty solidly screwed into the head, and I wimped out on crushing the threads in order to attempt removing them. I figured with my luck, I'd just shear them off rather than extracting them, so might as well wait for them to shear under their own steam. The seem in good condition just now, but I guess they're going to go without warning when they do go.

Which brings up back to our old friend, Mr Sump Plug. The bodge job (crush washer replaced with a rubber seal) is holding up fine with not a drop of leakage, although the plug itself was actually slightly slack when I did the recent oil change. I splashed out on an M12 bolt from B&Q and cut it to slightly longer than the sump plug bolt, but it's not for fitting, and I don't want to force it and chew up the sump any more. It appears that while the thread pitch is the same as the stock plug, each thread is slightly thicker than on the sump plug. I'll keep the bolt for an emergency repair attempt (in my new Pimp Tool Roll), although I'll have to bite the bullet and helicoil the sump sooner or later.

It may be sooner, since I've planned something a little... rash... which we'll cover in the Next Exciting Installment of bikeinabox. I see you shiver with antici...

Until then, I'll just confirm that the bike is still a sweet runner and great fun to ride. It reaches 50mph without breaking a sweat, then pushes on a bit higher, and that's all she wrote. Despite all the gearing changes, CDI, coil, filter and jet fiddling, the plain fact is that peak power is at 8500rpm and (with a 17 tooth front sprocket) that's an indicated 60mph, or a fraction over on the flat. That's south of the 100kpm required for an A motorcycle test, so you honest learners might want to beg, borrow or hire a genuine Japanese hack for sitting your test.

...pation.

Tuesday 16 June 2009

Stripping: not always a force for good


Sie würde ein gutes stripperin sein. Ein verfluchtes gutes!


Meesa say dissa bad stripping:


Take it from me, over-tightening the sump plug is firmly in the latter category.

So, 1000 km ticked up on the clock, the engine was spicy hot, and it was time for the first 'regular' oil change - actually the 4th change I've done, but who's counting? Me, that's who. The plug came out easily enough, and after a thorough drain, I put it back in. Like a cheapskate, I didn't replace the crush washer though.

I am fairly certain that I didn't over-tighten it this time, which just means that I must have over tightened it last time. In it went, tighten, tighten... slacken. Ouch. That dawning moment of realisation is just awful. When I took it back out again, it had the sump wrapped around the lower threads. Ouch. I'd blame the soft alloy (aluminium and cheesecake?) but this isn't just an issue on Chinese bikes: BMWs eat their sumps too. It's more likely an Idiot Tax issue than a materials problem.

The long term fix is to fit a helicoil. This will actually be a Good Thingtm in the end, since it'll provide a harder thread. However, it'll be tricky to do it in situ, and trickier to get all the swarf out, so I don't want to rush it.

So in the meantime, I've bodged it, in best mend-and-make-do stylee. Removing the defunct crush washer and the spring washer (what was that doing there?) from the sump plug and replacing them with a thin rubber seal - a repurposed bicycle inner tube repair patch - allowed the plug to reach further up into the sump and grip the good threads that I hadn't stripped. Then I tightened it up... very... very... carefully.

Praise to the Invisible Sky Giant, it's holding tight, with not even a hint of seepage after 2 days. I'll punt on it until the next oil change, since there's no point in disturbing it if it's good for now. Nicely dissembled, non?

To lighten the mood, I can report that actually riding the bike is still an absolute joy, and the engine is still getting smoother and stronger. Nothing has broken that I haven't broken myself. If I'd just leave it well alone, it'd be fine.

Friday 12 June 2009

The 1,000 word post

All of them "pimp".


Liking that. Liking that a lot.

For those playing along at home, that's a rattle-can job. 4 light coats of Plasti-Kote white primer, 36 hours drying time, a light sand, 4 coats of Plasti-Kote 4400 metallic bronze (it's got pronounced silver sparkles in it), 36 hours drying, another gentle sand, a further 2 very light coats of bronze, 24 hours drying, and then 3 coats of Halfords clear gloss lacquer on the mudguard and side panels and Halfords petrol resistant lacquer on the tank.

The Plasti-Kote paint is pretty decent, and quite hard to mess up as long as you go lightly and treat it primarily as an exercise in can-shaking punctuated by brief bursts of spraying. The lacquer, I wouldn't recommend: the regular stuff runs like a French soldier, and the petrol resistant variety needs to be put on far thicker than I'd like in each coat to get a decent gloss effect.

Still, with enough preparation and patience, I've got a pretty good finish going. It'll need some gentle smoothing and re-lacquering after the lacquer has cured (two weeks!) but it's ridable as-is until then. Also, I think the rear mudguard and luggage rack need painted to match, to balance the frontal pimpness.

I'm in half a mind to do the wheels and crash bars in metallic gold, although that may be a bling too far.

Saturday 6 June 2009

Hot naked barely legal bike action!


Saucy minx, flaunting her exposed frame like that! What's the occasion? We'll come to that in a minute. First, let's take a closer look while her kit's off.


That's the aforementioned K&N filter fitted to the carb. I'd previously thought that it was too big, and that it would foul the battery anyway, but it turned out that I just needed to cowboy up and clamp it on tighter. It was much easier with the carb removed, and while it's pressed tight against the battery, it's not under strain. In fact, it's partially holding the battery in place now, assisted by the traditional garden wire twisted around and over the battery.

Here's the void where the air box used to be: it could be used for more tools storage, or a sub-woofer...


The reason for taking the carb off was to fiddle with the jets. Following the advice from the usual suspects, I drained the float bowl (remember to turn the main fuel tap off first!) using the screw at the bottom of the carb. I then unbolted it from the engine intake and the old air box, removed the fuel and breather pipes, and wiggled it free from its mounts. Three small bolts underneath hold the float bowl on. With them removed, the main jet is exposed, in the centre at the bottom. I was surprised to find that the stock jet is only a 90 (i.e. 0.9mm diameter). I'd bought a 105 from Xian, and tried that, but it was too big, even with the K&N filter. Another next-day order secured 95 and 100 jets, and the 100 seems to suit nicely.

While I had the carb off, I also did the other recommended fix; raising the main needle. It's underneath the throttle cable on top of the carb. Unscrewing the end of the throttle cable reveals the spring that presses the needle down. Carefully pulling this clear of the top of the throttle slide revealed the top of the needle, with a circlip around it and another clip over it holding it down. With it all disassembled, I found that the circlip was in the middle of 5 grooves. I moved it to the bottom groove, effectively raising the needle and letting more fuel through at 1/2 throttle and above. It was fiddly getting it all back together, but just took patience.

With those changes made, the bike feels gutsier throughout the rev range (and incidentally makes a distinctive growl under throttle). These are definitely changes worth making.

Now... why is the bodywork off? The stock black has a nice finish, but I can't be doing with the Houniao branding, so it's time to break out the rattle can and wet-and-dry paper, and pimp things up another notch.


That's the front mudguard (Pioneer Nevada), tank and side panels. I won't be doing the rear mudguard, at least not initially, as I'm investigating alternatives. Well, I wouldn't be happy if I'd run out of things to tweak.

The parts are currently on about their 4th thin layer of white undercoat. They'll get another gentle sand and coat tonight, then tomorrow morning, I go for it with a can of Plasti-kote metallic glitter copper/bronze sourced from the local B&Q. Wish me luck.

Monday 25 May 2009

Screen power: enhanced


Armed with 2 sheets of 3mm 50cm x 50cm perspex (one clear, plus one in a very light blue tint, shown in the picture), plus a few hours sans kiddies, I had a go at bodging up a replacement for the PUIG screen. I should note that the PUIG did hold together fine, and in fact isn't a bad screen for the price, it's just that I wanted something a little bigger, and I'd cracked the PUIG when fitting the 8" screen to the 7" light on the Huonaio. With hindsight, I could definitely have avoided that by heating the screen before fitting.

The screen fabrication was pleasantly straightforward. A 7" plate provided a handy template for a semicircular hole in the bottom edge. A narrow fine toothed jigsaw blade easily followed the inside of the curve. Then I angled the sides into a basic inverted pyramidal shape, added a gentle curve to the top edge, and nibbled a little off the rear lower corners in order not to foul the indicator stalks.

Then it was out with the paintstripper heat gun, and the shaping was begun. It's a fairly simple process, it just requires patience and re-adjustments to get the lower sides curved in to fit the sides of the headlight, and a gentle curve across the whole screen. Clamping the bottom edges where the screen will attach to the headlight between (e.g.) two pieces of wood helps to keep them flat, or else it's easy to end up with very warped lower edges. If you're doing this yourself for the first time, then just take your time, move the gun steadily back and forth across the piece where you want the bend so that it doesn't get scorched, and don't force the perspex; once it gets up to temperature, it suddenly becomes very pliable.

Late in the process, I noticed that I'd stuffed up the top edge a bit, and I had to go back in with the jigsaw to even it up. Since the screen was curved by this point, I couldn't lay it properly flat, and managed to add a small crack. Ah, I can live with it.

The screen is attached just by bolting it to the headlight mounts, with 8mm holes drilled as far from the edges as I could manage. Just go up the bits one mm at a time and go very gently, and the perspex shouldn't crack. When I was doing the bolts up, I noticed that the twisted bottoms of the screen still weren't quite square, so I heated them up again gently while doing up the bolts. One side did crack very slightly, but I'm hoping that it holds together. If not, I can do the whole screen over, and this time I can just use the first attempt as a template to shape a second screen. Score!

It's a relatively tall screen, but it's resting against the instrument binnacle (and could be secured to it with a spare number plate sticky-pad that I'm sure I have somewhere), so I'm fairly happy that it's supported well enough. Actually, even at 50cm tall, it still manages to direct the airflow right onto my face... gaaaah. I'm not sure I want to go taller, but now I'm thinking... hmmm... could I lower the seat a bit?

Well, idle hands make for the devil's work, don't they?

Tuesday 12 May 2009

Size matters


Well, numbers matter.

The aforementioned 4+2 converter plug from Xian came with 5 wires (i.e. one missing). It fitted the sockets on the bike and CDI just fine, but the bike wouldn't start. A continuity check revealed that all wires were secure. Hmmm.

A visit to the Chinese Bike Forum over the weekend revealed a previous purchaser who'd also had a problem, which he'd solved by getting another converter with all 6 plugs wired up. A quick phone call to Xian got a 6-wire converter winging its way to me, entirely at their cost - they didn't even want the 5-wire one back. Very decent of them. They also said that they come with 5 wires from the Chinese supplier, and work on 90% of bikes. I've since found that older HN125 models do only have 5 wires on the bike side of the ignition; mine has 6 though, and needs all 6 wires.

Oh, I blew the ending: the new plug works fine with the POSH CDI. A quick lunchtime jaunt revealed a modest improvement in eagerness at mid to high revs. That's not the way I like to ride, but if you want or need to work your bike hard, the POSH seems like a good buy.

Since I'm unable to resist the urge to keep fiddling, I've got an NGK DPR9EIX-9 spark plug on order. To translate, that's 12mm / projected insulator / resistor / heat rating 9 (runs cooler than normal) / 19mm reach / iridium / 0.9mm gap. It's perhaps not ideal for the bike: I'll really have to try it out. This excellent CG 125 guide suggests trying it since as well as giving a stronger spark, it should help prevent power fade during extended high speed running. This isn't an issue for me normally, but I'm considering trying a jaunt up to Inverness in July with a fellow Huoniao (HN125-4F) owner, and am gradually trying to get my bike up to scratch, since his bike seems pretty pimped.

Since I can't find a cheap screen that I like, I've bought a couple of 3mm 50cm x 50cm sheets of perspex, which I'll have a go at cutting and bending with the aid of a heat gun to see if I can get a usable screen out of them. If I'd thought about it, I'd have heated the PUIG screen before fitting it to the smaller HN125 headlight, which might have stopped it starring.

Ah well - if it hadn't starred, then I wouldn't have the opportunity to get my hands dirty (and burned). That's what this bike is all about, after all.

Friday 8 May 2009

Performance anxiety

To my mild chagrin, there's very little space left to actually bolt things on to the bike, and it still hasn't suffered a failure. So out of desperation, I've had to resort to performance tweaks.

First, I fitted a 17 tooth front sprocket in place of the 16 tooth that was already replacing the stock 15 tooth. Interestingly, the rear sprocket is already a relatively small 43 tooth, giving the bike a long gearing, longer than that recommended by Xian Racing. Still, it felt good with this ratio, keeping the revs nice and low at commuter speeds, and I can always drop down a gear if the bike struggles. Theoretically, it will make low speed manoeuvres a little trickier, but I haven't noticed any difference so far.

I only barely managed to fit the 17 tooth sprocket with the stock chain. You (well, I) wouldn't think that such a small difference in the sprocket would tighten the chain up by so much, but it does. Even with the axle fully forwards, I couldn't get the front sprocket on with the chain on it, or the chain over it while it was fitted. I had to take the chain off the back sprocket, fit the front sprocket and chain, engage the chain on to the top rear sprocket then turn the rear wheel to wrap it fully round. It was touch and go, but once it was all on, there seems to be enough slack in the chain. Weird.

Next up, an after-market coil and HT lead.


I'm buying the marketing here: I have no objective grounds for believing that this unit is superior to the stock coil and lead. However, there are two things to bear in mind:


  1. It's very unlikely to be worse.
  2. It's red and orange, so it must be inherently faster...


Subjectively, the bike did feel smoother on my commute this morning, although (especially with the 17 tooth sprocket) I wasn't reaching the revs where a stronger spark should make a difference.

I should give the coil a good exercise on its own, but this afternoon, a new CDI ("POSH" branded, as recommended by a few Chinese Bike Forum posters) turned up, and I couldn't resist plugging it in.


Purty! It comes with a 4+2 rounded GY6 plug socket, so I've also bought a converter to the square 4+2 STD plug on the HN125-8. It's much bigger than the standard CDI, so has to nestle down the side of the under-seat area. At the top right here (where the old CDI was) you can see the accursed side-stand switch. I'm retaining it just in case it gets added to the MOT regs. I was watching Long Way Down, and was amused to see Ewan McGregor's BMW pimpmobile immobilise itself due to a defective side stand switch. On the advice of BMW UK, he just chopped it off and twisted all the wires together. Proper job!

Wait, did I say "Huonaio"? I meant "Reliant", of course.


Leave me alone - I'm in my Happy Place.

Saturday 2 May 2009

That's pretty pimp, right there


I think we're just about there as far as outer-wear goes.

That's the bike with a Pioneer Nevada front mudguard on - cheers to Llexeter for a next-day delivery when they finally sourced it - and rear crash bars.

That's two gambles that paid off. The mudguard is sized for the slightly smaller and not quite-so slightly wider 110/90 16 tyre that's fitted to the 125 Harley clones. In the event, it fits just fine over the Huonaio 3.25 18 wheel, but not quite so fine between the forks. I had to wiggle it in this way and that way to get it in place, and it's compressed just a little. It also needs to sit above the mounts on the HN125. I briefly considered cutting up the stock mudguard that I'd removed, but was struck with a rare attack of common sense: what if I couldn't get the Nevada guard fitted? Instead, I just fabbed up some brackets from... well.. I considered chopping up one of the missus' baking trays, but I have to admit that the mounts currently holding the guard on are made of a re-purposed tin of Quality Street covered in black Japlac. As an aside, this is an amazing paint; even when put on with a stiff scraggly brush, it spreads out into a lovely even coat. I'm slightly tempted to see if it can give a smooth coat on the tank and panels without resorting to 25 coats of wafffer thin spray paint. Slightly tempted.

The rear crash bars are 20 year old "new on the shelf" Britax branded bars labelled as being for a Honda CM200 T, in nice condition for their age. The brackets on the end of the bars rotate, which would allow them to fit a variety of bikes, and they went on the Huonaio no problem at all, attaching to the top suspension mounts, and the pillion footrests. They'd get in the way of a pillion rider's foot, but since The Man won't let me carry a pillion anyway, that's not a problem. They also make putting the bike on the centre stand a little more difficult, and can catch a trailing leg when pulling away, but I can live with that for the added protection from a drop or side impact. Plus... more chrome. Mmmm, chrome.

As the final touch, I fleaBayed some decal injket paper and printed up some labelling to cover up the Huoniao logos on the tank and side panels, to confound interested onlookers. I swithered over a DOOP logo, or War Rocket Ajax, but in the end I had to revert to type. The tank now sports an "Ad Astra per Aspera" Starfleet logo from one of those fictional Star Trek series, and the side panels boats a portentous name... the Reliant. Nobody - nobody - tell my daughter why she's called Miranda.

With the bike set up just so (the chain needed half a turn of tightening), I went for a jaunt today just for larks. About 40km - whatever that is in real money - across some gently windy A roads (the old, safe bit of the A77) and then back over the B764 Eaglesham moors road. Interesting road; it's a full width road which since it was bypassed is now marked out as "single track with passing places", with wide "cycle" tracks on either side. In practice this just means that road traffic going both ways does a little 60mph shimmy as it meets. Since our little Chinese bikes can easily sneak down a cycle lane, it's a fun ride. Later, I indulged in an outing on the local dual carriageways.

On this run, the bike's strengths and limitations become clear. It's a joy to ride, stable and composed at anything up to 50mph. Note the up to. When trying to achieve more than that, the vvviiibbbrrraaatttiiiooonnnsss start to come in. Nothing overly unpleasant while riding, but my feet were tingling when I got off! Any kind of uphill gradient, even a gentle one, quickly eats into the top speed, putting it more in the indicated 40-50mph bracket. On the straight, an indicated 60mph is easy enough, and downhill with a tailwind sees close to an indicated 70mph. The "tailwind" thing isn't trite; on little bikes like this, the wind is a significant factor.

Something that becomes apparent is that while the maximum power is at 8500 rpm, you only get that power if you get to that rev range. Easy to say, but the understanding only comes with experience. If the road conditions - incline, headwind - produce more drag than the power produced at (e.g.) 6000 rpm, then the bike won't get to 6001 rpm. The bike has more to give, it just can't give it.

That's perhaps more negative than it sounds. I was pleasantly surprised by how well the bike performed on the local dual carriageway. I was actually able to overtake cars past an indicated 50mph. Cautiously, carefully, I hasten to add, but the bike can do it when needs be: it's a 125, but it's a geared 125, not a scooter.

It was a lovely day, and the biking brotherhood was out in force. Many nods were exchanged - I do love a good biker nod - and on a supermarket stop off, I parked up next to a lovely red Jinlun JL-11. I'd be the first to say that Jinnys, Nevadas and the other Chinese Harleys (Charleys?) are absolutely gorgeous bikes with really consistent accessorising, but I don't feel that plonking the Huonaio next to the Jinny let the side down. I now have a custom "Custom" bike that is genuinely unique.

And I'm absolutely loving it.

Friday 24 April 2009

Reverse the polarity of the neutron flow!


I'm about done mucking around with LED bulbs. I like the idea in principle, but they have some serious problems in practice:


  • The don't give as much light as an equivalent sized incandescent. Yes, more light per watt drawn, perhaps more light in one narrow direction, but less overall light output per mount.
  • Because the power draw, and thus resistance, is lower, they can't be used as indicator bulbs without adding ballast resistors. I can't be doing with that, since it would complicate retro-fitting incandescents.
  • They're polarity-dependent, which can be an issue if the light fitting is bass ackwards.


This last is an issue because the small spots that I bought came with... wait for it... 6v bulbs, much as the Pilgrims must have used. I didn't notice this until they burned out, so I bought 12v LEDs to replace them. Mistake. The light from that size (MES) of LED bulb is very dim, plus in a double-whammy, the spots have a weird polarity: -ve/ground is connected to the centre contact, rather than to the bulb body, but the LEDs I got are sanely polarised and thus don't work. I managed to short a connection while testing this and blew my fuse. Credit to our Chinese chums: the Huonaio comes with a spare fuse inside the fuse holder, but I'll have to remember to get a replacement spare.

For reference, the bike and its electrics do actually work just fine without a fuse, with the power coming directly from the generator - it just needs kick started.

So I've got some regular MES 5W bulbs on fleaBay order. While I was there, I've taken another gamble on some 20 year old (but unused) rear crash bars for a Honda CM200 T, which I nabbed at a good price. The seller indicated that the sizing is adjustable (by rotating the mounts) so I'm optimistic that they'll fit. I can't remember the last time - or ever - that I saw a bike with rear bars fitted, so this is getting pretty Custom.

And as if by magic, LLExeter (Chinese Motorcycle Parts Online) called me back a full 2 weeks after I ordered a Pioneer mudguard, to say that they'd sourced one, in black rather than black and silver, complete with a scuff mark and accompanying discount. I'm happy to take it, since it may not fit anyway, and if it does, then I'm seriously considering a paint job for the bike.

I found that I liked the cheapo B-Square open-face helmet so much that I got the wife to gift me a Nitro retro openface helmet, in nice visible white.


It comes with a swappable visor and sun peak, has a medium-sized shell on a medium-sized inner, and I absolutely love it. One thing I've noticed is that wearing an open face makes me feel more vulnerable - like riding a pedal cycle - so I look around more, a task made easier by the lighter weight. I strongly believe that bike safety is more about visibility and accident avoidance than protection. That's not to say that I don't armour up, but not at the expense of feeling over-protected and complacent.

Before going for the retro, I popped into the local bike emporium to try on a Nitro X512 open face first, and really liked that too. To be honest, it's a more practical helmet, since the visor and sun peak can be on at the same time, with the visor fully flippable under the peak, giving the best of both worlds.


In the end though, practicality took a back seat to style. I just love the look of the retro. Yes, I've turned into that sort of biker.

Tuesday 21 April 2009

All is proceeding as I have foreseen


No posts for a while, since nothing has happened to the bike. Nothing has dropped off, disintegrated, exploded, or vanished into a parallel dimension. It's very strange.

I did have an oopsie when the bike missed, spluttered then ground to a halt on a hill. A frantic checklist finally revealed the problem: out of fuel. Oops. Apparently 100mpg doesn't mean that it runs forever on one tank. A flip to reserve and we were off again.

A back-of-the-envelope calculation reveals that was 320km on approximately 9 litres of fuel (I didn't fill it up initially), which is as near as makes no difference 100mpg. I expect that'll get a little better as the engine runs in, but I'm more than happy with that. I should get 350km+ out of a full tank, before reserve.

On the modding front, I added an auxiliary LED brake light on the top of my toolbox-topbox, but I managed to snap it while fitting, and it disintegrated while I was riding. I liked it so much though that I've ordered another. Further gearing changes can wait until the bike is run in - the 16 tooth sprocket gives it just enough extra that an indicated 50mph isn't a chore and (indicated) 60mph is achievable in short bursts without thrashing the engine.

While I remember, be cautious about believing any fleaBay seller flogging LED bulbs as R10W indicator replacements. Unless they want to tell you what the resistance is, I'd suggest that they're vanishingly unlikely to be plug-in replacements.

When I said I'd ordered a Pioneer Nevada front mudguard, I thought I had, but after acknowledging the initial order, Chinese Motorcycle Parts Online apparently can't be bothered communicating with me at all regarding the reason for not sending it, or their stock situation regarding alternative parts. I expect a phone call would sort it out, but I don't really want the part that much. I'm not sure if they understand the principle that click-to-buy encourages impulse buys - but only if you actually service your online orders.

For the record, the bike's first scheduled oil change at 300km was done at 330km - but was actually its third change. Once at 0km, again at 100km. I take de-swarfing pretty seriously. I should now let it get to 1000km before the next oil change, but I don't know if I can bear to leave it that long...

The plug looks fine at 300km, so I think I've got the fuel mixture about right. Although I could and may buy a combustion tester; for those who haven't seen one, it's effectively a spark plug with a window that lets you see the colour of the combustion in the cylinder. I have a car-sized one from the Ancient Olden Days, and expect if I find the right combination of Googlisms then I can source a smaller one, even though we're living in the Future now.

Monday 13 April 2009

Replacing the sprocket

MagicMan over at Chinese Bike Forum was asking about changing the front sprocket, so here's some images to try and explain it. I'd imagine the process will be very similar for most chain driven bikes.

I fitted a 16 tooth JTF259 sprocket (cheap and easily available at all good fleaBays). There's also do a 17 tooth sprocket, which I intend to try as well; I think this engine would be well suited to it (spoiler: it is, I'd suggest going straight to the 17).

First, slacken off the rear axle nut, circled in yellow here. The hex head circled in red is one of the axle adjustment / chain tensioning bolts.


Then if you're fitting a larger sprocket, you'll need to slacken off the chain. You can do this now or later, once you get the old sprocket off.

This is done by moving the axle forwards, for which you'll need to loosen off both adjustment bolts, then nudging (kicking, rubber malleting...) the rear wheel forwards. Take care to count the number of turns that you make so that you keep them both even!


I think I had to loosen them about 20 'flats' (i.e. about 3 or 4 full revolutions) per side, but it may be more. It'll entirely depend on how tight your chain was to begin with; checking chain tension is something that you'll want to do regularly anyway.

Now remove the sprocket cover. This is located above the left footrest. There are 2 bolts to undo, one at the top, and one underneath, right next to the gear change shaft. A socket with a universal joint and extender bar is very handy here!


The cover then lifts off easily. Under it is the sprocket. It's held in place by a retaining shim and two bolts. Put the bike in gear to stop the engine turning and undo these bolts...


Then you'll need to rotate the shim so that the holes line up with the splines on the sprocket. It can take a little fingernail-fiddling to get it lined up, but once it's oriented correctly, it should come off without the need to lever it.

Then the sprocket just slides off the spline, and you can take it out and replace it.

Fitting is just the opposite of removal. Put your new sprocket on; if it's a larger one, then you'll have to slacken off the rear axle adjusting bolts and knock the wheel forwards until you can get the sprocket onto the spline, or the chain to go over the sprocket.

Then the shim slides back on and rotates around until you can get the bolts back in. Don't push it too far on, or it won't rotate; just slide it on until it does rotate, then get it aligned.

The cover should pop back on easily, then it's just a matter of checking the chain tension, which you'll likely have to increase: tighten the adjusting bolts, by the same number of turns each side, until the chain is tight. There should be about 1/2" (10-15mm) of vertical movement in the middle of its length. Once you're happy, tighten up the lock-nut at the front of each adjuster bolt until it's secure.

Then remember to tighten up the rear axle bolt!

Finally, adjust the tension in the rear brake. If the axle has had to come forward to fit a larger sprocket, then there will be some slack in the rear brake. Adjusting it is just a matter of turning the knurled nut on the back to take the slack out. It helps if you press the lever forwards to take all the tension out, then turn the nut until it's tight. Due to the shape of the nut, there will be some slack when you release the lever, just enough to stop the brake binding.


Blurry sloppy photography, but hopefully you get the idea.

Last check: you did tighten up the adjuster bolt lock-nuts and the rear axle bolt, right?

Saturday 11 April 2009

Let there be lights!


Can you see a theme emerging? I like lights. I like lights a lot.

These are a couple of cheapo fleaBay spots that (only) just fit around the handlebars. The stock clamps wouldn't fit on the forks, but I wanted them up high anyway. I had to bend the mounts to get them to point forwards, but that's just more Custom.

I went for a jaunt today to buy a neck warmer and some thermal lining gloves, via a 60mph dual carriageway. The Huoniao quite happily hit an indicated 60 for a brief downhill period, before I backed it off. We're talking a mile or so here: I'm still in Running In mode, but at 250km, I'm starting to let the bike get a sniff of its top speed, in short controlled bursts. Bear in mind that I'm running about 7% under-revved; I definitely want to try a 17 tooth sprocket next, which should be a 13% reduction in RPM from stock.

Hmmm... what next? The Nevada mudguard is on order, so... top box?

I could fleaBay one from anything from £29 to £50 or so for a big double box or... isn't it just a box? So couldn't I just bolt a big cheap toolbox on the rack and padlock it?

I'm betting that I can. Shall we find out?

Friday 10 April 2009

An indication of problems ahead?


Today, the right rear indicator has given up the ghost. It may just be an early blown bulb, or it may be a loom issue like those encountered by both Elvgren and Lincoln DoD. Having read about that, I did cable-tie the loom into the front securing clip, so I'll be surprised if that's the issue, but I've been known to be wrong.

Also, made my first adjustment to the clutch this morning. The biting point was very high, so I slackened off the adjuster. I guess it's better to have the cable tight to begin with, as it'll likely slacken in use.

Oh, I've gone a bit Custom again and ordered a black and silver front mudguard for a Pioneer Nevada (a straight Harley clone). The Pioneer front wheel is a 110/90 16, the same size as the Huoniao's rear wheel, so I'm fairly confident that it's only 1" smaller in diameter (.5" radius) than the Huonaio's front wheel, and very slightly broader. I've measured up the forks and mounts and convinced myself that I can make it fit tolerably enough if I fab up some brackets. But then I've been known to be wrong. A lot.

Further bulletins as events warrant.

[UPDATE]

Blown bulb. Ah well, nothing exciting. I've checked the cable run anyway, and it seems OK.

The local petrol station couldn't come up with an R10W bulb, so I've bought a couple of R5Ws for emergency use, and fleaBayed 4 R10W LED bulbs which should hopefully outlast the bike.

Wednesday 8 April 2009

I am tha Nite Ryda


The 428 16T sprocket from Xian arrived today, and fitting went smoothly. I was surprised how many turns I had to take off the axle adjustment screws to fit the larger sprocket, but I think I managed to keep them even when I tightened the chain back up. The fact that I'm posting this from the sofa rather than a ditch bears witness to that.

By that time, it was 9:30 in the PM, and time for my first night ride. Shhhh... don't wake the sprogs or neighbours with the electric start. Fortunately, the bike is set up so nicely now that it started sweetly on the second kick. And then we were creeping off into the all concealing shadows.

Wow. Double wow.

The 16 tooth sprocket makes a surprisingly noticeable difference to the gearing. The engine is torquey and pulls well from low revs, so it seems to make sense to let it slap rather than scream. 5000 rpm (the notional running-in limit) in 5th gear now result in about 2 more of Her Majesty's Miles per Greenwich Standard Hour, up from 30 to 32. It doesn't sound like a huge improvement, but it's the difference between slightly holding up traffic and comfortably keeping up with it, and it should also result in 60mph at the same rpm that would have yielded 56mph on the 15 tooth sprocket. Given the low cost of these sprockets, I may even give a 17 toother (60mph from 53mph Old Money revs) a try once I've got the bike run in a little more.

The other zowie is the Xenon 50W/50W "blue white" bulb, of "upside down" fame; this was my first opportunity to see it doing its stuff in the dark. It's now producing a sensible spread, and the light level is genuinely impressive, and very nearly white. I actually had to pull over to adjust the headlight down a fraction, for fear of blinding other traffic. The missus confirms that it's highly visible in daylight traffic as well. So if you've got a bike, any bike, and are running on anything other than Xenon, then do yourself a favour and splash out all of £8 on one of these. It's cheaper than most other hi-vis aids that you could invest in.

Finally, the verdict on the "inside-out" K&N filter is that it seems to let enough air in - the bike went to 7200rpm / indicated 50mph without a hiccup - and results in just a hint of "classic" growl at large throttle openings. I reckon I'll keep it.

The only downer on the day is that the clods at Adrian Flux / Bikesure have lost the copies of my license(s) that I sent them. The joy of being a pessimist is that I fully expected this, so I can just sigh and crank out (several) more copies rather than lose the rag over it. Rain on my parade? Not today, pen pushers.

Screens up!


... but structural integrity failing.

With the blustery winds we've been having lately forever, I felt that the Huoniao needed a screen. I dithered and swithered, then ordered a Jinlun JL-11 screen, which has a classic cruiser shape. However, it had two disadvantages. One, the lower mounts probably wouldn't have fitted the Huoniao, and two, it was out of stock and I couldn't get it.

Being both impatient and tight, I instead went for a "PUIG Universal Mini Sports Touring Motorcycle Screen", in tinted. I'd have gone clear, but they were out of stock.

The image above shows the screen fitted to the Huoniao, prior to replacing the bolted on front L plate with a stickied-on floppy one on the screen. I've also tilted it a little more towards the vertical. It looks OK, but looks can be deceptive - even at its bargain basement price, I couldn't recommend this screen for the Huoniao.

It's designed for 8" headlights, and the Huonaio has a 7". I couldn't find this info anywhere, but should have checked before ordering. It does bend in to fit the headlight brackets, but at the cost of slight starring in the perspex around the mounts. I've duck taped over them and refuse to think about what's happening sight-unseen. The other issue is that the mounting bracket is made of very soft metal, and got chewed up a bit while bolting it on. It seems secure enough just bolted to the headlight, but only time will tell.

On the bright side, it does seem to be keeping the worst of the wind off of me, so I can't fault it there. I'll see how it works out.

Which reminds me, I said I'd report on the Windjammer that I fitted to my helmet. On balance, I'd recommend it; it does keep some noise and drafts out. However, it doesn't keep out all wind noise, so it's not, repeat not, a replacement for ear plugs.

While I was buying mis-sized parts, I also got a 42mm K&N air filter from Xian. I'd roughly measured up the carb intake, but this filter is just a little too big. [UPDATE: a 42mm filter fits the carb just fine, I just needed to cowboy up and clamp it on properly]. Also, to fit a filter like this, it's necessary to take the whole airbox out, disconnecting the two breathers plugged into it. Unfortunately, the air box forms the backing for the battery, so if I took the box out, I've have to find some way of securing the battery, a task made harder by the filter slightly fouling the front battery mount.

So instead, I tried something a bit Custom. I removed the air filter inlets and took off the foam cylinder. It turns out that the 42mm filter is a perfect fit over the inner inlet (with a sort of funnel inlet leading to a cylinder). Unfortunately, it can't be fitted directly onto that without some... modification. It's hacksawing time!

Quicker than you can say "Shouldn't you think about this...", I'd hacksawed the plastic cage off of the outer inlet, and most of the cylinder off of the inner one. I then re-attached the inner inlet, clamped the filter onto the end of the truncated cylinder, and replaced the whole inlet onto the air box.

Bearing in mind that the filter is fitted in "reverse", I had no idea how well this would work. In the event, it... works. The caveat is that sharply blipping the throttle from a low idle will stall the engine, but a smooth throttle works just fine. I haven't done enough distance to claim that it's improved the running, but I just don't like the big thick foam filter fitted as standard, and am happier with it out. Note that even with the butchering to the inlets, I could still refit it, by sandwiching the lip between the two inlets.

That'll likely require some re-balancing of the mixture, which I've been nudging around by a 1/4 turn to try and optimise. I've also re-done the valve clearances - I'd misgapped one of them, and curiously, you can hear that it's just one that's off - and reduced the gap on the spark plug slightly from 0.8mm to 0.7mm, since the bike was missing slightly when I pushed it (very briefly) to the heady heights of 50mph.

The next mod was the much vaunted 16 tooth front sprocket, which will reduce the revs required to hit warp speed. Again though, my measuring failed me. I bought a 428 16T for "17mm shafts". However, after removing the sprocket cover (held on by two fairly obvious chromed nuts), it transpired that the hole in the centre of this sprocket is too small for the Huonaio. I've ordered a a larger 428 16T from Xian, and await its arrival.

While I was mucking with the sprocket and chain, I took the time to tighten the chain up a little. It's just a matter of loosening off the rear axle bolt slightly, then turning both adjuster bolts by the same amount on each side (then locking them off again). The wheel still looks (and feels) straight, but I haven't done a string test yet.

Well, I need to leave myself something else to work on...

Saturday 4 April 2009

April showers


What's on the agenda today? My first wet run, on the infamous Kenda Manlung nylons. But first: some unnecessary maintenance!

I changed the oil at 0km just to get the stock unknown out. However, I couldn't get the oil filter out, so now at the heady 100km mark, I decided to do another change to get any initial swarf out. I'm still on Halford's 10W40 semi synthetic motorcycle oil, which should be more than good enough for this 35 year old engine.

After a run to get the engine hot, I drained the oil and set about the filter plug with my new multi-sided 23mm socket, which was all that B&Q had available. It rubbed almost immediately! Rotational impact, heat, rustola, nothing shifted the plug. It just rubbed and rubbed, even when I bashed a 22mm spanner onto it. The Chinese Bike Forum provided the helpful info that this plug is aluminium, not steel. Aaargh!

In the end, brute force and ignorance won out. After another liberal dose of penetrating oil, running a butane torch around the join again, smacking the bejeesus out of firmly tapping the plug around the rim, towards the engine, hammering the 22m spanner firmly back on again and then delivering a mighty whack to the end of it, the plug finally gave up the struggle and shifted.

Lesson learned: if you get a bike with this engine, find yourself a hexagonal 23mm socket. Don't waste your time - and your plug corners - with a multi-sided socket. It'll just end in tears... and barked knuckles, burned fingers...

The filter was mostly clear, although it had a few tiny scraps of what looked like plastic wrap in it. Other owners have reported this as well, although I can't think what it is or how it got in there. Ah well, it's out now, and the filter plug replaced with some copper grease and a sane amount of torque.

Next, valve clearances. Following the great instructions at that link, I got the valves exposed in no time. The CG125 owners' site agrees that the clearances for both valves should be 0.08mm (0.003 inches). Unfortunately, my cheapo feeler gauges only go down to 0.1mm, so I adjusted (loosely) to that. Skipping ahead to the ride, it was clearly too much: the valves were audibly buzzy. So I re-did them by hand, adjusting them to the 0.1mm feeler, then giving them another small turn and checking that the feeler wouldn't quite go in (but that there was still a gap!). Even with this tiny difference, the valves were much quieter. In fact, they were probably set just fine to begin with by the factory. Ah well, now I know they're definitely OK. Approximately definitely.

Since the rain was tipping down, I decided that it was time to have the side stand switch out. Rather than cutting it out and splicing the wires, I just unbolted the switch, cut the cable tie under the bike holding the cabling and plug in place, pulled the cabling up and fed it through under the seat. The whole assembly, switch and all, now lives in there, still greased up. I even cable tied tightly around the switch shaft so that it couldn't somehow become depressed. That should be that, hopefully. Now when the bike strands me in the middle of nowhere, it should be for some other reason.

One last thing before the ride: I couldn't resist the urge to fiddle with the air filter. The air box is under the left hand side panel. There's an inner 40mm-ish inlet letting in to a larger cylinder with a thick foam filter around it. Air is then drawn forwards from the space around this foam filter into the carb.

First things first, take all the filters out. Wow. Blat-blat-blat, goes the bike, very "classic". But we can't run like that, so I put the big cylinder with the foam filter back in, but left out the 40mm centre inlet. As far as I can see, all the air still has to go through the foam filter, but there's a little bit more growl under throttle. Utterly pointless, but then, so is the bike.

I'll leave it like that for now, but I've got a 43mm K&N filter on order which I can either attach straight onto the carb (removing the air-box) or perhaps even place over the box-inlet, removing the foam cylinder. I'll try to get some pictures of all this in order for it to make half an ounce of sense.

Finally, we're ready for the road. In a steady but not torrential rain, I set off. The back wheel definitely did twitch slightly while pulling away from a sharp bend heading downhill, but for the rest of the ride I was super-cautious and it behaved itself just fine. Still, it did twitch, so better tyres are on the list of things to get sooner rather than later.

Oh look, the sun's out now. And I forgot to get onions when I went out for my wet run, so... that's as much excuse as I need!